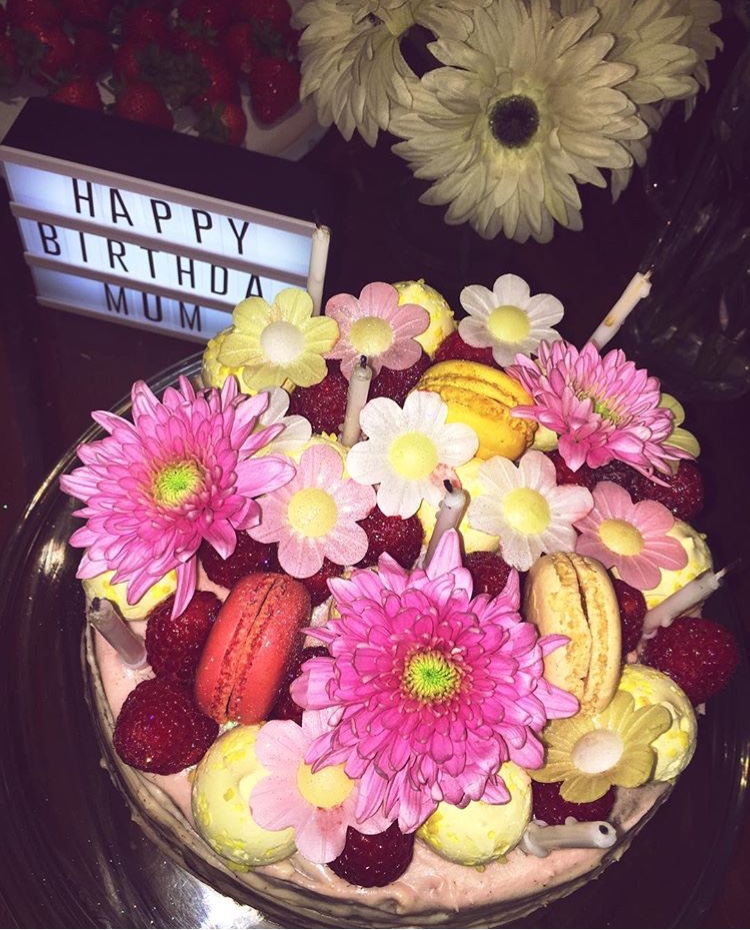
Four layered lemon drizzle cake with lemon curd, raspberry jam & ombre pink vanilla icing, topped with all things nice. Time for a showstopper.
This is the cake I made for my mum’s recent birthday. I wanted this cake to look aesthetically pretty whilst not compromising on the taste. I based the cake recipe around Mary Berry’s lemon cake, however I have added a few steps myself, as I found that the cake did not have as much flavour nor was moist enough without the changes. I browsed many supermarkets and online to find cute little cake decorations which I’ll link below, however add whatever you please.
Ingredients:
For the cake batter:
- 200g soft butter
- 350g caster sugar
- 350g self-raising flour
- 2 tsp baking powder
- 4 eggs
- 8 tbsp milk
- Finely grated rind of 2 lemons
For the cake syrup: (to drizzle over the cake once cooked to make it more moist)
- Half a cup of lemon juice (should need 2-4 lemons to get this)
- Half a cup of caster sugar
For the buttercream:
- 500g icing sugar
- 160g soft butter
- 50ml milk (preferably whole milk)
- A couple of drops of vanilla extract
- Pink food colouring (optional)
For the cake filling:
- Raspberry jam
- Lemon curd
For the decoration:
- Raspberries
- Macaroons (I used the M&S summer collection macaroons)
- Wafer daisies
- Super mini lemon meringues
- Edible glitter
- Pink flowers, from a bouquet, not edible (optional)
Ingredients:
- Preheat the oven to 180C/350F/Gas 4. Grease 2 smallish round baking tins and line with baking parchment. I also grease on top of the baking parchment.
- Mix all the cake batter ingredients together, with an electric whisk if you have one, or by hand if you do not. Mix for about 2 minutes until well mixed.
- Pour half the mixture in one of the round tins and the other half in the other round tin.
- Bake in the preheated oven for about 30-35 minutes. Once done, to check the cake is cooked, put a skewer in the cake and it should come out clean, not wet. Leave the cakes on a rack to cool.
- Whilst the cakes are cooling, make the syrup by mixing together the lemon juice and sugar. Bring to a boil then reduce and let simmer for about 10 minutes. Taste it, for a good balance of sweet and sharp. If it is too sweet then add more lemon juice and vice versa.
- Once the cakes are cooled, cut each cake in half so you have 4 halves of cake. I also got the 2 halves which were the top of the cake in the oven, and cut them to take some of the raised edge off. Ideally all the cake halves should be flat on both sides for the layering. Then get a skewer and prod the 4 halves all over until there are small holes in it. Do not let the skewer go all the way through the cakes. Then evenly distribute the lemon syrup by pouring over all 4 cake halves.
- Make the buttercream by beating the icing sugar and butter together until creamed. Then add the vanilla extract and milk and beat for 5-10 minutes. If you want to create an “ombre” effect (when colour transitions from light to dark) then divide the icing into different bowls and make different shades of pink by adding more or less food colouring.
- Now time to layer. Put one half of cake down onto a cake stand or plate. I usually secure it to the surface with a little icing on the bottom. The bottom and top of the final cake should be the 2 surfaces that were at the bottom of the baking tin, as these are the flattest surfaces.
- Layer the cake by spreading the raspberry jam on one inner side, and the lemon curd on the other inner side, then the vanilla buttercream in the middle. Repeat twice more, until layered.
- Then I covered the sides and top of the cake in the different shades of pink, gradually going from light to dark pink for the “ombre” effect.
- Top the cake with all the decorations.